The Joy of Stitch was an experiential workshop held as part of the Beyond the Toolkit symposium at Falmouth University in Feb 2014.
This page offers follow up support for embroidery techniques and to share photos and thoughts about our finished pieces, or even just to show some work in progress.
This page offers follow up support for embroidery techniques and to share photos and thoughts about our finished pieces, or even just to show some work in progress.
Pictorial guide: using a paper transfer
If you are new to embroidery, or if you have not done it for a while ( like myself), I found that using a paper pattern as a guide can be really helpful. You can either hand draw your design, or use an existing one. I'm using layout paper (50gsm), it is robust for your needs but because it is slightly thinner that regular printer paper, making it easily to remove after you have finished your embroidery.
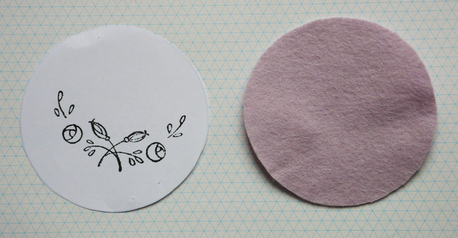
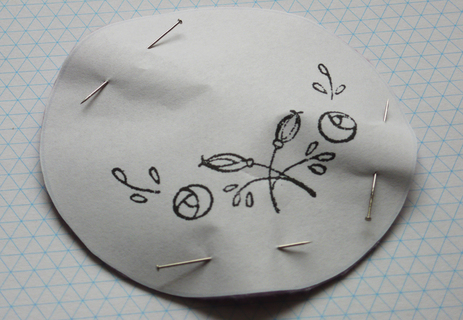
Pin the pattern to the felt. Pattern courtesy of 'love to sew'
|
Useful online tutorials for embroidery techniques.
|
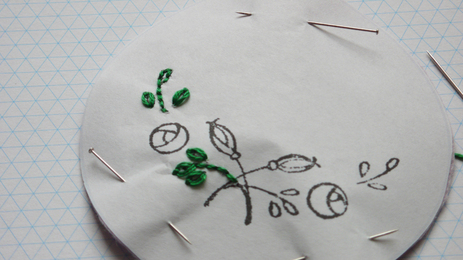
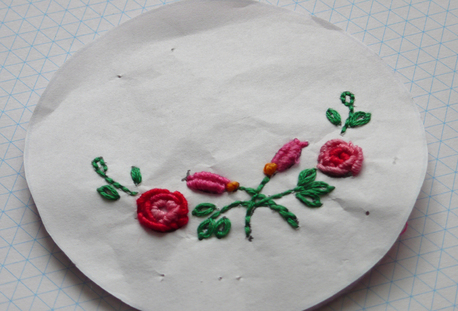
Work the pattern in your desired stitch. I'm starting off with
back-stitch and lazy daisy.
Also to note, I have split my embroidery floss to use 3 strands,
rather than the full 6 strands which would have made the stitches
too bulky and loose definition.
back-stitch and lazy daisy.
Also to note, I have split my embroidery floss to use 3 strands,
rather than the full 6 strands which would have made the stitches
too bulky and loose definition.
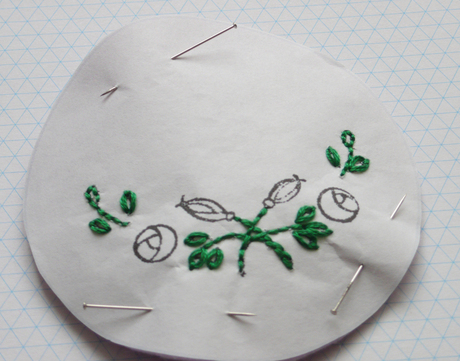
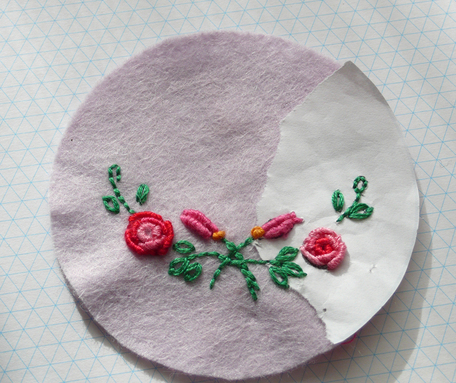
And when you have finished the design, remove the paper
(tweezers are useful to get at those pieces of paper that can get
caught in between some of the stitches).
(tweezers are useful to get at those pieces of paper that can get
caught in between some of the stitches).
